Print file setup guide
Discover how to create print-ready PDFs with our straightforward print file setup guide. It covers everything from interior pages and covers to double spreads, and includes links to our useful collection of templates.
- How to make print ready PDFs
- Interior page setup
- Double spreads
- Cover setup
- How to submit your files
How to make print ready PDFs
This straightforward guide on setting up your print files will show you how to prepare your PDF designs for printing. For a deeper understanding of these requirements, each section includes links to more comprehensive information.
Before starting, please verify that you are using the correct dimensions, your images are at 300dpi, you're employing CMYK colours for printing, and that you've included bleed in your designs. If unsure, always consult our checklist prior to submitting your print file.
Please speak to our customer services team if you require a free PDF setup template and they will be happy to supply a PDF for your chosen product. Each template comes with a detailed explanation on how to use it, complete with fold lines, trim lines, bleed, and quiet areas. These are not availabke for custom sizes, but can be used to set up bleed, quiet areas and margins.
Inside page setup
When preparing the internal pages for a book or brochure, it’s crucial to consider the printing process and design your pages for the best results. Here's our straightforward guide to setting up your pages for a multi-page book or brochure.
1. Choosing page layouts
In Adobe InDesign, your document defaults to double page spreads, but you can switch to single pages by navigating to Document > Set Up and unchecking ‘Facing Pages’. Ifyou’re using Illustrator or Photoshop, set your canvas or artboard to either single or double page dimensions, including bleed.
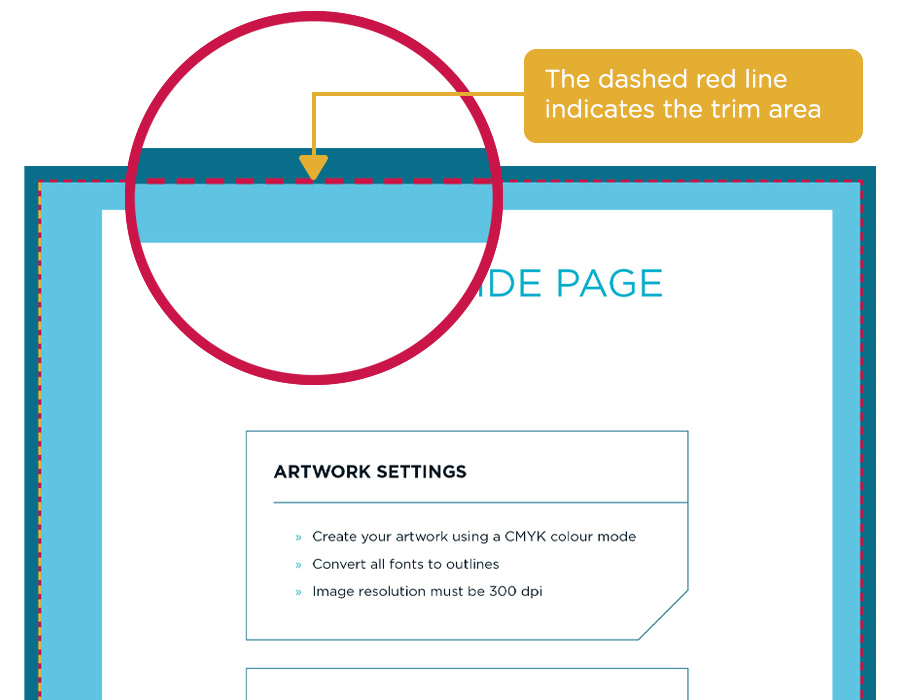
2. Add bleed and quiet areas
Always add a 3mm bleed regardless of the page size, and keep a 5mm quiet area along the edges to avoid text being cut off during binding.
Failing to include a bleed can result in a visible white line if the cutting blade deviates slightly from the trim line.
In applications, extend any page content that meets the trim edge into the bleed area.
For Photoshop or Illustrator, you must adjust margins and quiet areas manually and extend the canvas by 5mm on all sides to include the bleed. Alternatively, use a YouLovePrint template for guidance.
In InDesign, ensure to select “Use Document Bleeds” in the Export PDF dialogue.
3. Setting up margins
For single page flyers or staple-bound booklets, your margins can mirror your quiet area. For perfect bound, wire bound, or hardcover books, you’ll need additional space on the inside margins to prevent content loss after binding.
A good practice is to set your inside margin at a minimum of 12mm for a 30-40 page booklet, adding an extra 1mm for every additional 10 pages.
4. Preparing for output
Before finalising your file, complete our checklist to ensure images and pages are correctly formatted and ready for output. In InDesign, you can switch from facing pages to single pages, though it might require some adjustments to align elements within the bleed areas.
When outputting, choose the appropriate page range, ensure ‘Spreads’ is not selected, and output as a ‘High Quality’ or ‘Press Quality’ PDF with bleed marks enabled.
Remember to select “Use Document Bleeds” when exporting from InDesign.

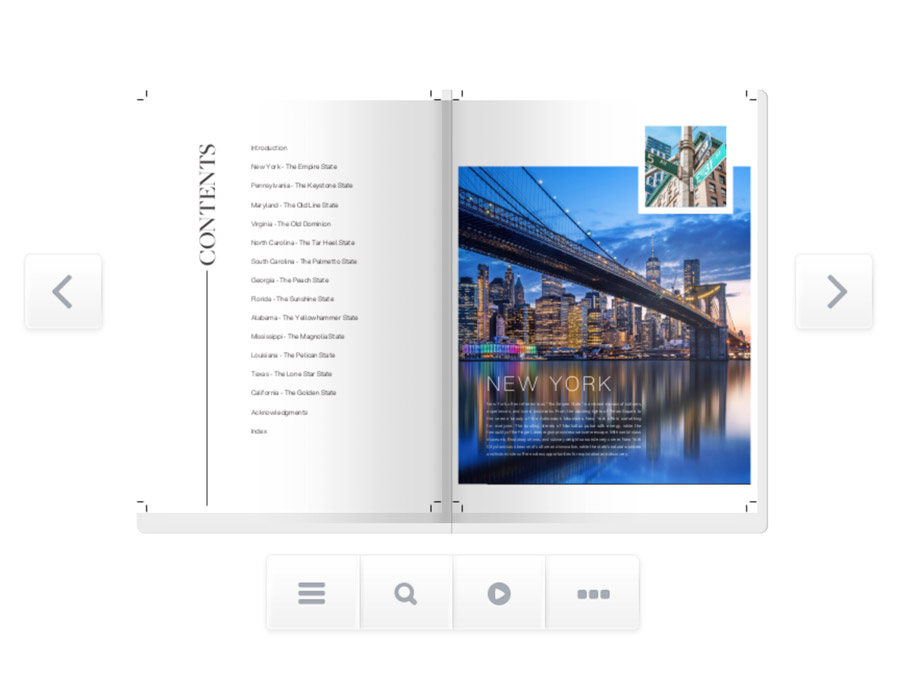
Double spreads
Double page spreads can dramatically enhance the look of your book or brochure by stretching designs and images across two full pages. They're perfect for everything from photobooks, where a single image might span both pages, to magazines that feature expansive visuals or text. Here’s our straightforward guide to setting up your double page spreads.
1. Set up your file as double pages:
Typically, Adobe InDesign sets up documents with facing pages; page one (your cover) appears on the right, with subsequent pages laid out side-by-side in the Pages palette.
If you're using Illustrator or Photoshop, make sure your canvas or artboard is twice the width of your trim size. For instance, for an A4 book, you would set up a 420mm wide canvas (2x210mm).
2. Adding bleed and quiet area:
Include a 2.5mm bleed regardless of size, and ensure a 5mm quiet area around the edges of your design to avoid cutting off crucial text during the binding process. Without adequate bleed, you might end up with a white edge if the cut strays slightly outside the trim line.
After setting the bleed in the software, extend the page content that meets the trim edge right into the bleed area.
In Photoshop or Illustrator, calculate the correct margins and quiet areas, and increase the canvas size by 6mm to include bleed on all sides. Or, you can use one of our ready-made template files.
In InDesign, ensure to select “Use Document Bleeds” when exporting your PDF.
3. Make sure your design works across a spread:
Align all elements appropriately, and adjust spaces in words that stretch across a page to prevent characters from disappearing into the gutter. For images, consider offsetting them.
To offset an image in InDesign, split your image into separate frames on different pages rather than a single frame across both. Move the left image 2.5mm left and the right image 2.5mm right, then adjust the frames to fill the pages and bleed correctly, creating a 5mm duplicated image area in the middle that, when printed, won’t be visible as it lies in the gutter.
Although it may not look ideal on your screen, the formatted text and offset images will appear flawless when printed and bound into a book.
4. Exporting files as spreads:
When exporting files as spreads in InDesign, choose ‘Spreads’ in the export panel. When uploading your file to YouLovePrint for printing, our software will accurately split the pages.
While they will show as single pages in the Artwork Dashboard, the files sent to the printer will maintain perfect alignment.
If you're uncertain about setting up your document, utilise our free double spread layout template for guidance.
Cover setup
Creating your cover file depends on the type of binding you've selected. For simple folded leaflets or staple-bound booklets, we use the first page of your multi-page PDF (or the file named Page 1). Our software handles everything automatically from there.
For case bound or perfect bound books, separate cover files are necessary. These should be provided as a spread which include the spine
1. Creating a cover file
When setting up a cover spread, make sure that the front cover of your booklet is positioned on the right-hand side and the back cover on the left and vice versa for the inside cover where you should leave a clear area for the spine
If you're starting a new file from scratch, it should be twice the trim size, plus additional space for the spine. For instance, an A4 book with a 5mm spine would require a cover width of (210mm x 2) + 5mm = 425mm. Hardback books have an additional requirement for hinges and additional image to wrap around the case.
2. Calculating your spine width
YouLovePrint automatically calculates the spine width when you create a job quote, based on the number of pages and the paper weight you select. You can check the necessary spine size in our calculator before adding your job to the cart, or in your order confirmation email should you decide to upload the file after payment.
3. Special features
If you're enhancing your cover with a special feature, such as varnish or spot colour, create a secondary file with the same dimensions as your main cover file. Specify the areas for the special finish in a single colour. Check out our guide to special features for more detailed instructions.
How to submit your files
Uploading your files to YouLovePrint's print ordering system is straightforward! Plus, there's no commitment to purchase, even after you've uploaded your print-ready files.
After our price calculator estimates the cost of your project and you are happy with your file uploads, simply click ‘Add to Cart’.
To upload your artwork, you'll need to submit two separate PDF files to YouLovePrint:
Cover File: This should contain two spreads. The outer spread needs to feature your front cover design, spine, and back cover design. The inner spread should show your inside front cover, the spine area (used for glueing), and inside back cover design, though these areas can be left blank if preferred.
Inner File: This should include all of your pages laid out as single pages, not as spreads.
The maximum file size for uploads is 2GB. If your file exceeds this limit, please get in touch with our team, and we'll assist you in integrating your file into our workflow.