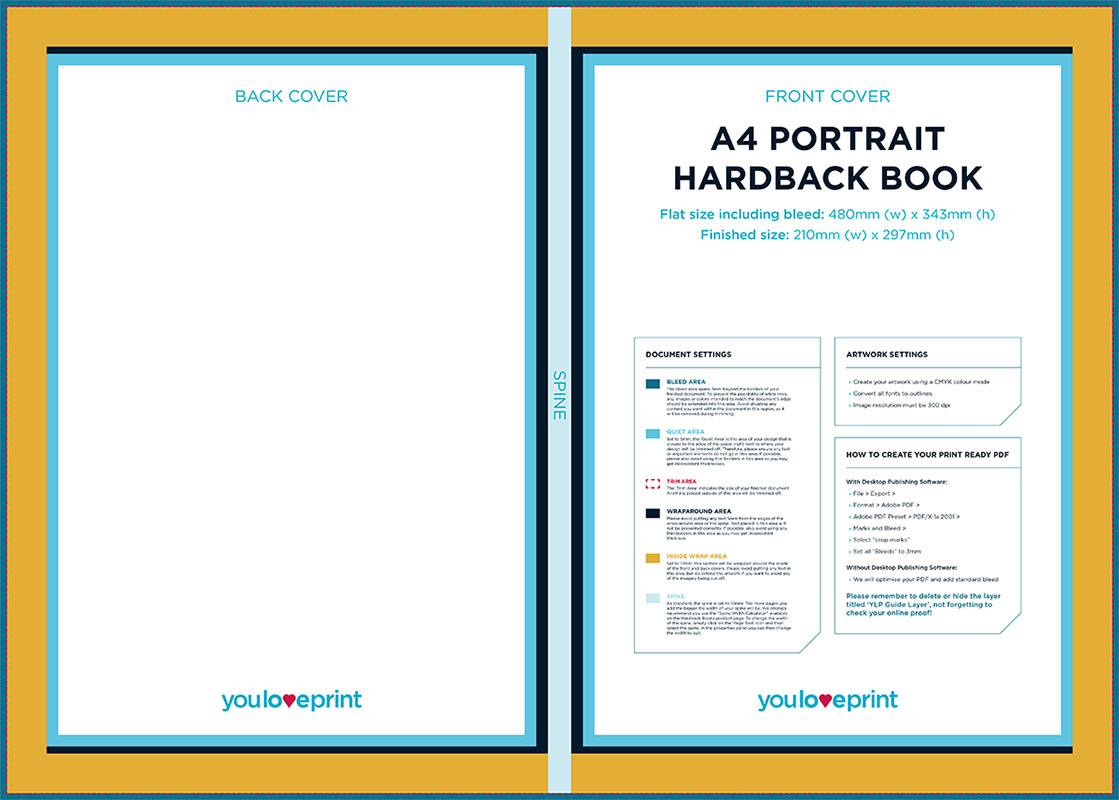
Full bleed printing file set up
Bleed areas in your design are vital for correctly printing your products. Grasping the concepts of bleed areas, trim lines, and quiet areas is essential for any creator. Fortunately, it's much easier than it initially seems.
Full bleed printing
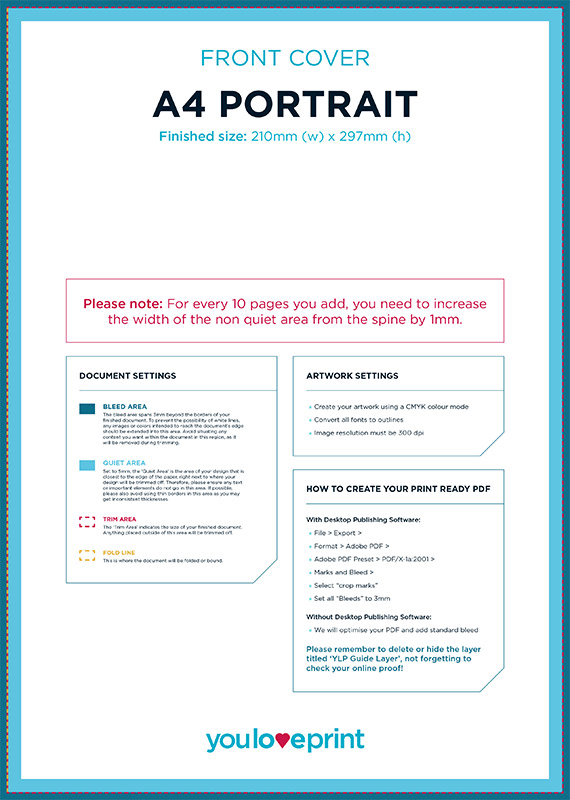
We recommend a 3mm bleed margin outside of the trim line and maintaining a 5mm quiet area within it. Some products have different bleed requirements, which we will cover below.
You don’t need to include visible bleed markers in your final design for printing; however, accounting for these during the design phase is crucial. This practice ensures your product is free from white borders and that vital design elements aren't lost to trimming or obscured by the book's binding.
Including a quiet area within the trim line ensures critical design components are not positioned too near the paper's edge.
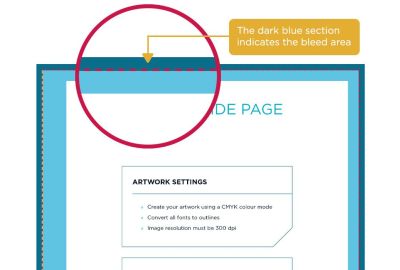
Bleed area
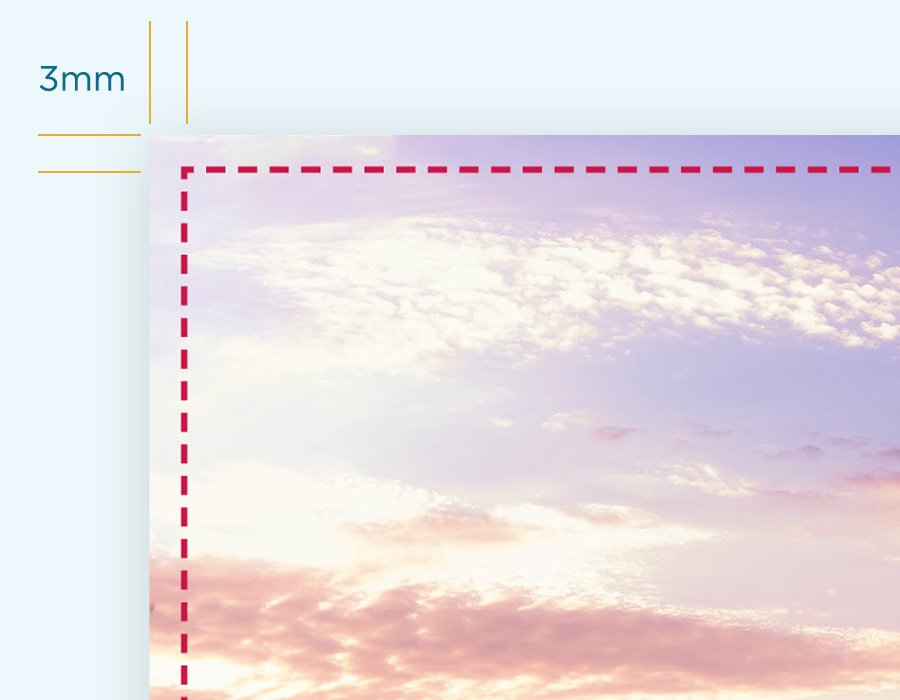
The 3mm bleed area extending beyond the trim line will be cut off, yet it's essential for your design to fill this entire bleed area.
If you do not add bleed, your design might result in a noticeable white border where the ink doesn't reach, especially if the cutting blade falls slightly outside of the trim line.
After adding the bleed area in your design tool, any page content reaching the trim edge should also stretch into this bleed area.
While the standard bleed size for most products is 3mm, certain items like casebound book covers may differ. We'll address these specific exceptions further on.

Trim line
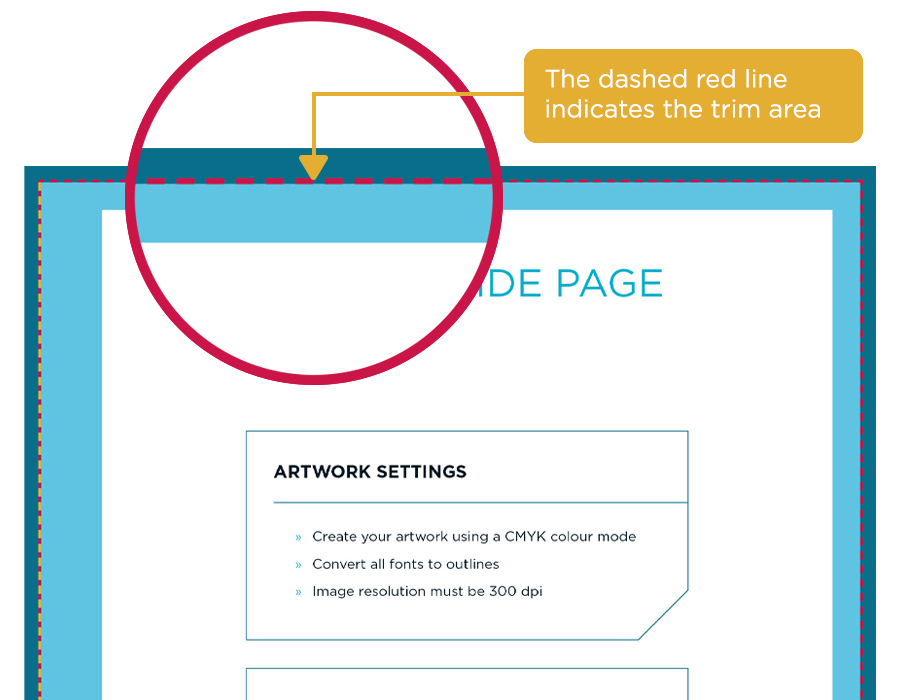
Just at the page's border, you'll see a dotted line; this is our guide for trimming your paper. During the printing process, variations can happen, sometimes causing the blade to veer off, ever so slightly. It's all part of the manufacturing and is acceptable within industry standards, but it could lead to your paper being cut a fraction beyond or inside the trim line.That's precisely the reason for having bleed and quiet areas—to protect the vital parts of your design.
Learn more about printing variance.
Quiet area
The 5mm quiet zone, set within the trim boundary, fulfills two roles. Similar to the bleed zone, it is a margin of safety if the cutting blade strays slightly from the trim line, potentially encroaching into this space. This ensures that vital design elements such as text and graphics are positioned away from the paper's edge, enhancing the visual appeal of your printed product.
Typically, a 5mm quiet area is recommended, though this may increase for products like perfect bound, wiro bound, and casebound books.

Bindings
This template suits simple print jobs, such as saddle stitched booklets and single-sheet flyers or posters. For more intricate printing requirements, like perfect bound, casebound, or wiro bound products, larger bleed and quiet zones may be necessary.
Extending your design
Ensuring your final print has a polished and professional appearance requires adding a bleed, a simple yet crucial step. Just extend your design beyond the page's edge by an additional 0.125” inches to fill the bleed area entirely.
For those using InDesign, remember to choose “Use Document Bleeds” when exporting to PDF, or your design will miss this necessary bleed extension.
The design has been extended an extra 3mm past the trim line below